Want a Tip? Get involved!


To all young (and experienced) teachers out there:  I have an easy (and simple) tip that will instantly transform your relationship with your students: GET INVOLVED!  Whether it be leading the yearbook club or student council, volunteering to keep the gate at sporting events, or coaching a sport, when you are involved and active in the building, the students take notice.  When students see you playing an active role in their interests (and their school) they come to realize that you are truly “in it” for them.  Does it require more time outside the classroom? Absolutely.  Does it mean you will spend more time at school? For sure.  But, does it mean you will develop more meaningful relationships with students in the classroom?  You betcha.  

So, just how do you do it?  Volunteer!  Tell your principal you’d like to lead the club that has that opening.  Express interest in the coaching position that just became open.  What’s that?  You don’t know anything about coaching the lacrosse team or the chess club? Well, learn!  Youtube is a great resource to teach you the basics!  Don’t feel comfortable taking on something so foreign in your first year?  Ask the coach or whoever is “in charge” if you can help out - that way you can learn from them as you go!  What if there is nothing offered at your school that you have an interest in?  Well, start your own club!  Find something in your content area that you can lead!  Find your niche!  In history, I’ve recently launched the History Club that meets after school to conduct research on annual National History Day projects and to prepare for our state competition in the We the People program.  Down the road I hope to create a Model UN team (a looooong way down the road).

I have always seen leading extracurricular activities as an extension of the classroom.  Second only to creating hands-on, active learning experiences, I have found no other way to more efficiently create a positive rapport with my students.  And, while building positive relationships to facilitate learning is always the goal, I must say that being involved throughout the school has helped me too! I have taken more ownership in my building.  I get excited as I see goals that seemed so far out come to fruition.  I enjoy getting to know my students outside of the standard classroom setting.  So, if you want my tip, get involved!


Why you should consider Interactive Notebooks in the Middle Grades

Lindsayprofile-blueWhy hello there! It’s Lindsay here and I’m going to share with you a bazillion reasons (ok a few) why you should stop what you’re doing RIGHT NOW and get on the INB train.

inb stress

I’ll be honest. When I first started using Interactive Notebooks in my intervention classes, my students looked at me like I was nuts. They were big bad middle schoolers for goodness sake and I was asking them to cut, glue and color on a daily basis.

At first glance, interactive notebooks can appear:

  1. childish
  2. unnecessary
  3. time consuming
  4. unorganized
  5. messy

Before I actually used interactive notebooks, I was a big believer in all of those things. I didn’t understand the point of using them and didn’t know of any teachers in my building who had them in their rooms. It wasn’t until I started reading up on them online (years ago, before they were cool) that I realized their true potential.

Big Kid INBs To avoid making your students feel like they have a glorified coloring book, try making any of the cutsey stuff optional. If part of their grade includes color, they’re going to feel like they are in preschool. Encourage neatness of course, but don’t require “decorations.”

A Necessary Tool No matter which subject you teach, an interactive notebook can be an amazingly valuable tool.  Regular notes are boring and regular binders are disorganized. Notes, activities and examples are not kept together by skill in binders. They are grouped instead by the type of resource. Pages easily rip from binders and things get lost. INBs keep everything organized, under control and intact.

A Time Saving Tool If you don’t prepare yourself and your students, interactive notebooks CAN be time consuming. If you use them correctly and give your students some of the responsibility, you can actually save time by using them. To save time cutting, I try to make the majority of my INB resources have straight lines. This allows me to immediately cut multiple copies of something on a standard paper cutter as soon as they come off the copier. By eliminating the need for students to cut every single thing, you can save a ton of time. If your students are prepared for class each day with scissors, glue and colored pencils (or crayons if that’s your thing) no time will be wasted gathering or returning materials during class. Many INB resources are created as outlines, so students are not taking notes from scratch. Instead, they’re filling in key words, completing activities and highlighting important things.

Amazing Organization As I mentioned before, INBs are insanely organized. I use a table of contents for each and every unit, not just one for the entire notebook. This helps kids narrow down what they’re looking for and find it easily. I also make my contents sheets have tabs so students can easily see what unit they’re looking for.

inb tabs

inb contents


Not as Messy As You Think Yes, glue can get messy if not usedinb no mess properly. Yes, you will have that student who will think it’s cute to use as much glue as possible. That same student will quickly learn how difficult it is to write on a page that’s soggy and lumpy. Glue bottles are better than glue sticks because they hold forever and ever. Glue sticks just don’t hold that well. I honestly prefer two sided tape because there is zero mess, but for many that’s just not practical because of the cost. If you set clear expectations from the beginning when it comes to the ways to glue properly (small dots around the perimeter of the pages) and dispose of scraps, the mess doesn’t have to exist. To handle scraps, I purchased a few super cheap plastic trash cans (bathroom sized) from the store and set them near the student desks. Most students didn’t even have to get out of their seat to be able to dispose of their scraps.

Stay tuned for another INB post in which we all share why we feel like INBs are a valuable resource specific to our content area!

Lindsay

My September 11th Literacy Unit


Hi! I'm Erin from Lovin' Lit. My favorite lesson I teach with my 6th graders is my September 11th Literacy Unit. All of the components of the lesson can be accessed or downloaded FREE!


I find it fascinating that each year, my 6th grade students know less and less about this poignant day in American history. And since 6th graders in my district study world history all year, I take it upon myself each year to teach a 9/11-themed literacy unit around the anniversary of September 11th.

I start this lesson by showing my students the amazing 9/11 Memorial Timeline found at http://timeline.national911memorial.org. I use my SMART Board (this year, I'm adjusting to my not-so-SMART Promethean board, but you get the point) to walk students through the morning of September 11th and try to bring that day into focus for them so that they can feel the heaviness of what happened.


So, what's so great about this interactive timeline? I'm so glad you asked! Let me show you...

By clicking on each element of the timeline, you'll open some type of multimedia or artifact to bring that day alive for your students.

Examples of this include a screen shot of a security camera that captured a terrorist walking through airport security.

A seat map from one of the flights. Go ahead and take a closer look at the names of those souls who were on board. Because I teach at a Catholic school, we'll stop and pray for the souls.

The students are silent as they listen to an audio recording of one of the hijackers.


We also listen to an audio recording of one of the souls on board as we discuss the many messages that were left for loved ones on the morning of September 11, 2001.

There are also videos taken by individuals and narrated as we get to see others' perspectives on the events unfolding.

Those are only a FEW examples of the wonderful media included in this timeline to hopefully convince you to use it in your classrooms next week! If you're like me, your mind is spinning with the many concepts you can apply to this timeline.. artifacts.. firsthand accounts... primary sources... point of view.. perspective.. wow, right!?

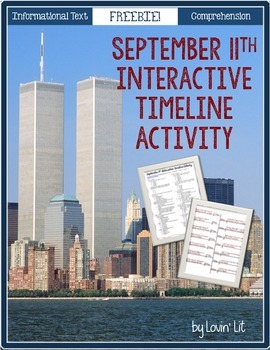
After I walk my students through the timeline - and that typically will take up an entire class period - I'll spend the next class period in the computer lab so that my students each have access to a computer in order to complete the timeline activity. I've formulated 20 high-quality multiple choice questions that will have the students interacting with the timeline in order to find specific information. And, I've made this lesson free on TpT in hopes that you will share it with your students.


And of course, as I do with everything, I have included an answer key to make your life (or this lesson) a little bit easier for you. If you decide to use this lesson in your classroom, click here to download it from Teachers Pay Teachers, and please consider leaving feedback to let me know how it works for your students! =)


This year I'm taking advantage of my students overwhelming interest in all things September 11th related and adding a few more activities to my September 11th literacy unit. Here's what I'm planning for Days 3-4.

I made my own timeline of what I thought were important events from 9/11. The events come straight from the interactive timeline we've been using. Of course, they're all important, but we're working on discerning and extracting the most relevant information. Here's mine:

Of course, there are ways to slightly alter this activity in order to simplify it for other students, use it with more immature students, or differentiate within your own classroom. You might have them create a timeline that focuses on only one aspect of September 11th. This is easier than looking at all of the events on the timeline and discerning which ones are most important.

You might have your students look for

  • all events related to flights
  • all events related to the North Tower
  • all events related to emergency response
You get the idea. I made a few blank timelines with different numbers of events.


I also created some activities that were more scaffolded. Here they are, in order of increasing difficulty. Easy first.

Given the events, find the times. Great for ESL or struggling students.


Given the times, find the events. They'll have to shorten the event descriptions. An example is shown.


Find the time or event. Once again the students will have to do some shortening of the event descriptions.


If you're using partially completed timelines, challenge your highest students with this one! Find an important event to fill in the blanks on the timeline. Remember, each event must be between the times indicated above and below the event!

I went and added all of these additional pages to my original Interactive Timeline Freebie on TpT, so simply download the updated version to receive these new activities. Here's a link to the updated product.


Finally, I'll have my students write a short summary to practice writing in chronological order. Because I want my students using quality, vivid verbs, we'll first brainstorm vivid verbs that might be used in a 9/11 summary. I'll start students off by suggesting words like crashed, devastated, terrified, and my students will typically come up with better verbs than I had even thought of.

Also, because it's the perfect time to practice using where parts in sentences, such as:
  • At 8:19am
  • After both towers collapsed
  • As officials notified South Tower tenants to remain in the building
  • Once the FAA grounded all flights
I'll have my students underline all of the where groups and color code them. If you're using any of my writing units, this will fit in perfectly!

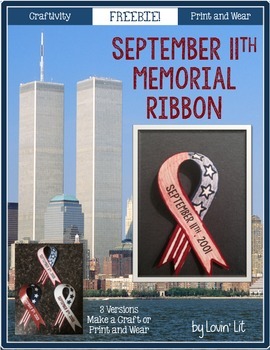
And we are going to make and wear our 9/11 ribbons on Thursday in remembrance of those who lost their lives in the tragedy. I made them for my students and also posted them as a freebie on TpT. Click the product below to download on TpT. If you decide to use it, please consider leaving feedback.